
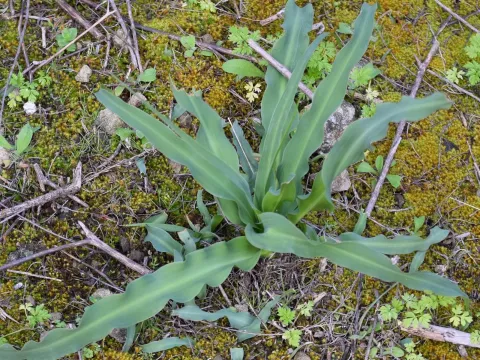
Chlorogalum
Chlorogalum
Seeds of Chlorogalum are best sown in late autumn to allow for natural stratification, which is essential for uniform germination in the following spring. Alternatively, they can be sown in early spring after being pre-chilled in a moist medium for several weeks.
What the section contains

Chlorogalum
For optimal results, seeds should be sown at a depth of approximately 1 centimeter in a well-draining soil mix. Maintain consistent moisture during the germination period, as the young seedlings are highly sensitive to drought until they develop their first small bulb.
When starting in containers, use a mixture consisting of equal parts sand, peat, and organic compost. Ensure the pots have adequate drainage holes, as the roots of Chlorogalum do not tolerate standing water, which can quickly lead to fungal rot.
Transplanting seedlings to their final location in the garden should be done with extreme care to avoid disturbing the root system. Space the plants about 25 to 30 centimeters apart to allow for proper air circulation and expansion of the foliage.
Growth is generally slow in the first year, as the plant invests most of its energy into developing its underground storage structure. Patience is required, as most Chlorogalum species do not reach maturity until their second or third year of growth.
Chlorogalum belongs to the Asparagaceae family and is native to the Mediterranean-like climates of California. It thrives in well-drained, sandy, or rocky soils that prevent waterlogging, which is the primary threat to the plant's health.
The plant is exceptionally drought-tolerant and adapted to hot, dry summers. During the active growing season, light watering is beneficial, but once the foliage begins to wither, irrigation should be stopped entirely to mimic the plant's natural dormant cycle.
Full sun is required for robust growth and proper development of the bulbs. While the plant can tolerate light shade, exposure to direct sunlight for the majority of the day is essential for photosynthesis and the accumulation of energy reserves in the bulb.
Soil pH should ideally be neutral or slightly alkaline. Chlorogalum is not a heavy feeder, but a small amount of low-nitrogen organic fertilizer applied during the early spring can help promote faster vegetative development.
Temperature tolerance varies by species, but most are adapted to mild winters. In areas with significant frost, it is recommended to apply a thick layer of mulch over the bulbs to provide insulation against the cold ground temperatures.
The primary threats to Chlorogalum are soil-borne pathogens, particularly fungi such as Fusarium and Pythium, which thrive in poorly drained soils. Overwatering is the most common cause of bulb rot.
Insects such as bulb mites can occasionally attack the roots or the base of the bulbs, causing a decline in the plant's vigor. Monitoring the health of the bulbs during storage or before planting is a key management strategy.
Slugs and snails can be problematic for young seedlings, especially in the spring, as they feed on the succulent leaves. Implementing physical barriers or organic baiting around the planting zone helps protect the young shoots from damage.
Weed competition is a significant concern for developing plants, as they grow slowly. Regular weeding around the base of the plant is necessary to ensure the young Chlorogalum does not become smothered by aggressive weeds.
Viral diseases, while less common, can lead to stunted growth or discolored foliage. If a plant appears consistently weak or shows abnormal yellowing patterns, it should be removed and destroyed to prevent the spread of the infection to healthy individuals.
Harvesting the bulbs is typically performed when the foliage is fully withered and brown, indicating the plant has entered its dormant stage. This timing ensures that the maximum amount of nutrients is stored within the bulb.
Carefully lift the bulbs using a digging fork, ensuring a wide margin around the plant to avoid slicing into the bulb tissue. Any mechanical injury can quickly lead to post-harvest decay if the storage conditions are not ideal.
After removal from the soil, brush off excess dirt and cure the bulbs in a shaded, well-ventilated area for several days. This hardening period helps the outer layers of the bulb tissue to dry, creating a protective barrier against pests and rot.
For seed production, collect the seed capsules when they begin to dry and turn a tan or brown color but before they burst open. Store the seeds in a dry, dark place until the next sowing season to maintain high viability.
Store cured bulbs in paper bags or mesh containers in a cool, dry environment. A temperature range of 5–10 degrees Celsius is perfect for maintaining the health of the bulbs throughout the dormant season until spring planting.