
Hardy Hibiscus
Hibiscus moscheutos L. x H. syriacus L.
Description
Sowing dates
Hardy Hibiscus is typically propagated through division of mature clumps in early spring or through softwood cuttings. Propagation from seeds is also possible, though it requires a greenhouse environment and careful temperature control to achieve consistent germination rates.
Seeds should be scarified or soaked in warm water to soften the outer coat, which significantly improves the chances of successful sprouting. Sowing into a high-quality, well-draining potting mix should occur several weeks before the last frost date to ensure strong seedling development.
Transplanting seedlings to their permanent outdoor location requires a site with full sun exposure. The soil should be amended with organic matter to provide the necessary nutrients for the plant's rapid growth during the summer season.
Spacing between plants should be approximately 3 to 4 feet to accommodate the large, bushy habit of the Hibiscus moscheutos. Proper spacing is essential to ensure adequate airflow and prevent the development of moisture-related issues.
Early spring planting allows the root system to become established before the onset of the heat of summer. Consistent moisture during the first year is vital for the plant to reach its full potential and bloom abundantly.
Growing requirements
As a member of the Malvaceae family, the Hardy Hibiscus thrives in open, sunny locations with at least 6 to 8 hours of direct light daily. Its impressive, large flowers are highly dependent on high light intensity for optimal color and size.
The soil requirements for this crop include a preference for nutrient-rich, moist, but well-draining ground. While they are known for their tolerance to damp conditions, they must not be planted in stagnant water, which could lead to root rot.
Regular watering is essential, especially during the peak flowering stage. In periods of extreme heat or drought, the plant should be provided with deep irrigation to maintain soil moisture levels and prevent premature bud drop.
Fertilization with a balanced, slow-release fertilizer in early spring promotes vigorous vegetative growth. A second application in early summer, high in potassium, can help maximize the quality and duration of the floral display.
In colder climates, the plant undergoes a period of dormancy. After the first heavy frost, the stems naturally die back to the ground, and it is standard practice to mulch the root zone heavily to protect it from freezing temperatures.
Main diseases and pests
The most common pests affecting Hardy Hibiscus include aphids, spider mites, and whiteflies. These insects tend to thrive in dry conditions, so monitoring the foliage regularly is critical for early detection and mitigation.
Fungal diseases, such as leaf spot and various rots, can occur if the humidity levels are too high or if the plants are crowded. Maintaining proper spacing and removing debris helps to mitigate the risk of these pathogens.
Insecticide treatments should be applied at the first signs of infestation, following label directions carefully. It is best to avoid broad-spectrum pesticides to preserve the population of beneficial insects in the garden.
Fungicidal sprays may be used preventatively in high-humidity areas to protect the plant from spore-borne infections. Always apply treatments during calm weather to ensure even coverage on all surfaces.
Sanitation practices, including the removal and destruction of infected parts, are the most effective non-chemical methods to control the spread of diseases within the hibiscus bed.
Harvesting
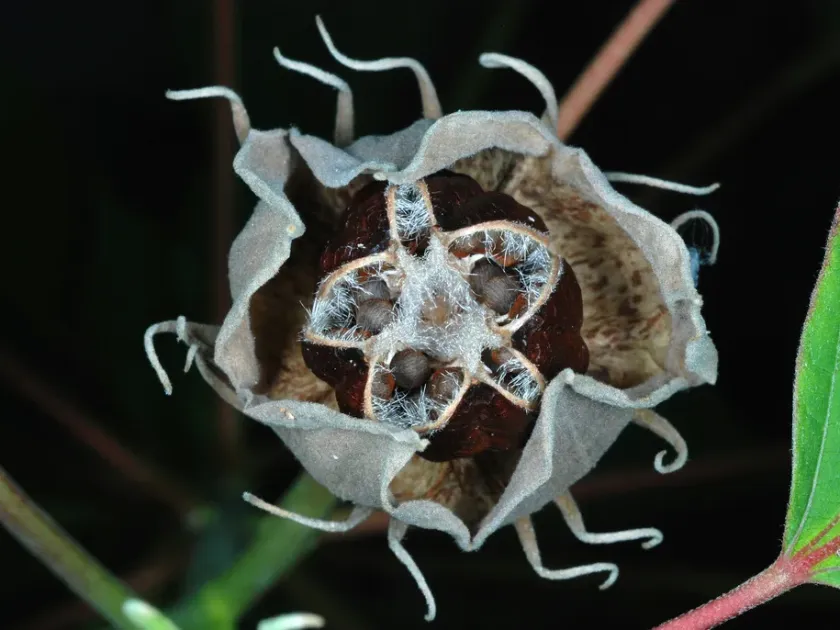
Seed harvesting involves waiting until the seed pods turn brown and begin to split open naturally. This process usually occurs late in the season, requiring dry conditions to ensure the seeds are not damaged by moisture.
After the stems have died back completely due to frost, they should be pruned to within a few inches of the soil surface. This clean-up process is essential for maintaining garden aesthetics and reducing potential sites for overwintering pests.
For floral arrangements, blossoms should be cut early in the morning when they are just starting to unfurl. This technique helps extend the life of the flower, as individual blossoms typically last only a single day.
Deadheading throughout the summer helps the plant conserve energy and encourages the development of more buds. This manual intervention ensures the plant maintains a tidy and attractive appearance throughout the growing season.
Successful management of the plant's cycle, from spring growth to winter dormancy, is the key to maintaining a healthy and productive display year after year.