
Austroderia fulvida
Austroderia fulvida
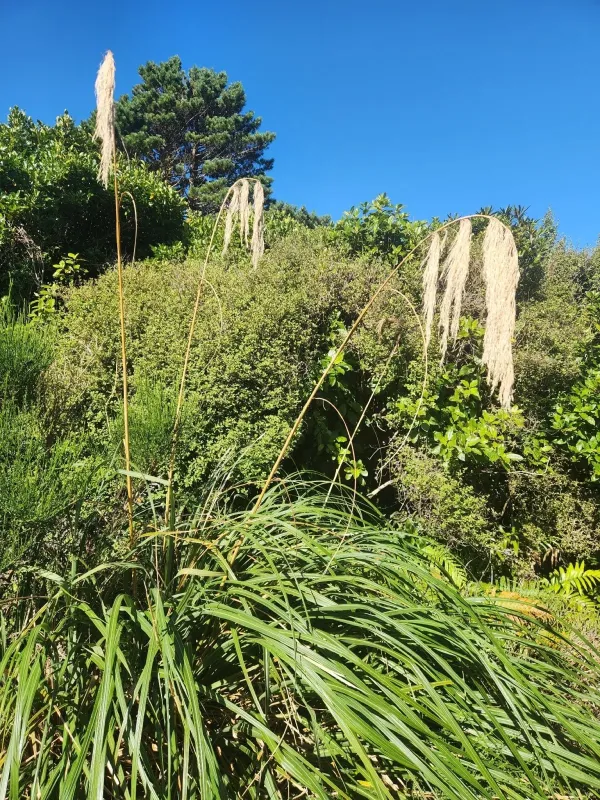
Description
Sowing dates
Sowing Austroderia fulvida seeds is best done in late winter or early spring using a protected environment like a greenhouse. A consistent temperature of around 18–20 degrees Celsius is necessary to ensure successful germination, alongside a moist, well-draining growing medium.
Since the seeds are tiny and require light to germinate, they should be surface-sown and barely covered with a fine layer of sand or vermiculite. Maintaining consistent humidity is critical, as drying out during the germination process can drastically reduce the success rate of the seedlings.
Once seedlings have developed several true leaves, they should be pricked out into individual pots. This step allows for the development of a robust root system before the plants are moved to their permanent location in the garden, ensuring better survival rates during the transition phase.
Hardening off is a mandatory process before planting out. The seedlings should be gradually introduced to outdoor conditions over two weeks to acclimatize them to temperature fluctuations, which prevents transplant shock once they are placed in the open ground in late spring.
When planting, ensure enough space between individual clumps, ideally 1.5 meters apart. This spacing is crucial for airflow and to prevent competition for resources, allowing each plant to reach its full size and display its natural, sprawling form without being crowded by other vegetation.
Growing requirements
Austroderia fulvida thrives in full sun, which is essential for developing strong, upright flower spikes. While it may tolerate partial shade, maximum exposure to sunlight will result in denser clumps and more vibrant flower plumes, making it a standout feature in the garden.
The plant is not overly demanding regarding soil type, but it performs best in fertile, well-drained loams. It does not tolerate waterlogged conditions, so ensuring excellent drainage is imperative, especially in areas with heavy or clay-based soils, to prevent root decay.
Regarding climate, this species prefers moderate temperatures. While it has some tolerance for frost, providing mulch to protect the crown during extreme winters is recommended. In very cold regions, growing it in containers allows for protection during winter months by moving it indoors.
Once established, Austroderia fulvida is remarkably drought-tolerant, thanks to its deep roots that tap into moisture reserves. Occasional watering during prolonged dry spells is sufficient to keep the plant healthy, as it is adapted to survive with minimal supplemental water after the first year.
Maintenance includes periodic fertilization with a balanced, slow-release fertilizer during the active growing season. This supports the vigorous production of foliage and enhances the development of the spectacular golden inflorescences that characterize this magnificent ornamental grass.
Main diseases and pests
This grass is generally resistant to most common diseases that affect agricultural cereals. However, improper management, particularly excessive moisture, can lead to fungal issues and root rot. Ensuring that the soil remains well-draining is the most effective preventative measure.
In hot and dry conditions, pests such as aphids or spider mites may occasionally infest the plant. Regular monitoring is essential to catch these early, and if necessary, applying mild biological controls or insecticidal soaps can manage the population without harming the environment.
Fungal infections like rust can occur if the plant is grown in dense, poorly ventilated areas. Maintaining adequate distance between plants and ensuring that the internal parts of the tussock are not trapped in moisture are key to preventing the spread of these pathogens.
Integrated pest management is recommended. Avoiding excessive nitrogen fertilization helps keep the foliage tough and less attractive to sucking insects. A clean gardening practice, removing debris from around the base of the plant, prevents pests from using the litter as a overwintering site.
Regular sanitation, such as removing old, dead foliage in late winter or early spring, is a proactive way to maintain the health of the plant. This practice reduces the habitat for pests and promotes vigorous new growth, ensuring the plant remains a beautiful focus in your garden.
Harvesting
The harvest of the plumes for dried floral arrangements should occur when the inflorescences are fully expanded and fluffy but before they begin to shed their seeds. Collecting at this stage ensures the best aesthetic quality and longevity for decorative indoor use.
After cutting, the plumes should be hung upside down in a dark, dry, and well-ventilated location. This drying process preserves the natural golden-yellow coloration and keeps the structure intact, preventing the plumes from drooping or losing their delicate shape during storage.
For a finished look, a light spray of floral adhesive or hairspray can be applied to the dried plumes to seal them and prevent shedding of the small seeds. This simple step makes the decorations much more durable, allowing them to last for many months as elegant indoor displays.
Spring pruning is vital for the health of the plant. Using sharp garden shears, cut back the old foliage to near the ground level before the new growth starts. Always wear gloves, as the leaves can be very sharp and may cause small cuts on your skin during handling.
The pruned remnants can be shredded and used as mulch, providing valuable organic matter back to the garden soil. This practice of recycling plant material is both eco-friendly and practical, supporting the long-term fertility and health of your garden ecosystem.